mirror of https://github.com/Nofated095/blog
125 lines
11 KiB
Markdown
125 lines
11 KiB
Markdown
---
|
||
title: Ubuntu To Go 制作教程
|
||
date: 2021-05-05 06:31:04
|
||
cover: https://assets.ubuntu.com/v1/9d42b2ab-3B-embedded-linux_AW.svg
|
||
tags:
|
||
- Ubuntu
|
||
categories:
|
||
- 写BUG日常
|
||
- 教程
|
||
---
|
||
把 Ubuntu 装进移动硬盘
|
||
<!--more-->
|
||
|
||
{% raw %}<article class="message is-success"><div class="message-body">{% endraw %}
|
||
本文安装系统为 Ubuntu 20.04.2 LTS
|
||
{% raw %}</div></article>{% endraw %}
|
||
本文部分摘自
|
||
|
||
<script type="text/javascript">
|
||
|
||
window.onload=function(){
|
||
var LinkCards=document.getElementsByClassName('LinkCard');
|
||
if(LinkCards.length != 0){
|
||
var LinkCard=LinkCards[0];
|
||
var link=LinkCard.href;
|
||
var title=LinkCard.innerText;
|
||
LinkCard.innerHTML="<style type=text/css>.LinkCard,.LinkCard:hover{text-decoration:none;border:none!important;color:inherit!important}.LinkCard{position:relative;display:block;margin:1em auto;width:390px;box-sizing:border-box;border-radius:12px;max-width:100%;overflow:hidden;color:inherit;text-decoration:none}.ztext{word-break:break-word;line-height:1.6}.LinkCard-backdrop{position:absolute;top:0;left:0;right:0;bottom:0;background-repeat:no-repeat;-webkit-filter:blur(20px);filter:blur(20px);background-size:cover;background-position:center}.LinkCard,.LinkCard:hover{text-decoration:none;border:none!important;color:inherit!important}.LinkCard-content{position:relative;display:flex;align-items:center;justify-content:space-between;padding:12px;border-radius:inherit;background-color:rgba(246,246,246,0.88)}.LinkCard-text{overflow:hidden}.LinkCard-title{display:-webkit-box;-webkit-line-clamp:2;overflow:hidden;text-overflow:ellipsis;max-height:calc(16px * 1.25 * 2);font-size:16px;font-weight:500;line-height:1.25;color:#1a1a1a}.LinkCard-meta{display:flex;margin-top:4px;font-size:14px;line-height:20px;color:#999;white-space:nowrap}.LinkCard-imageCell{margin-left:8px;border-radius:6px}.LinkCard-image{display:block;width:60px;height:auto;border-radius:inherit}</style><span class=LinkCard-backdrop style=background-image:url(https://zhstatic.zhihu.com/assets/zhihu/editor/zhihu-card-default.svg)></span><span class=LinkCard-content><span class=LinkCard-text><span class=LinkCard-title>"+title+"</span><span class=LinkCard-meta><span style=display:inline-flex;align-items:center><svg class="+"'Zi Zi--InsertLink'"+" fill=currentColor viewBox="+"'0 0 24 24'"+" width=17 height=17><path d="+"'M6.77 17.23c-.905-.904-.94-2.333-.08-3.193l3.059-3.06-1.192-1.19-3.059 3.058c-1.489 1.489-1.427 3.954.138 5.519s4.03 1.627 5.519.138l3.059-3.059-1.192-1.192-3.059 3.06c-.86.86-2.289.824-3.193-.08zm3.016-8.673l1.192 1.192 3.059-3.06c.86-.86 2.289-.824 3.193.08.905.905.94 2.334.08 3.194l-3.059 3.06 1.192 1.19 3.059-3.058c1.489-1.489 1.427-3.954-.138-5.519s-4.03-1.627-5.519-.138L9.786 8.557zm-1.023 6.68c.33.33.863.343 1.177.029l5.34-5.34c.314-.314.3-.846-.03-1.176-.33-.33-.862-.344-1.176-.03l-5.34 5.34c-.314.314-.3.846.03 1.177z'"+" fill-rule=evenodd></path></svg></span>"+link+"</span></span><span class=LinkCard-imageCell><img class=LinkCard-image alt=图标 src=https://www.littleqiu.net/images/Avatar.png></span></span>";
|
||
|
||
for (var i = LinkCards.length - 1; i >= 1; i--) {
|
||
LinkCard=LinkCards[i];
|
||
title=LinkCard.innerText;
|
||
link=LinkCard.href;
|
||
LinkCard.innerHTML="<span class=LinkCard-backdrop style=background-image:url(https://zhstatic.zhihu.com/assets/zhihu/editor/zhihu-card-default.svg)></span><span class=LinkCard-content><span class=LinkCard-text><span class=LinkCard-title>"+title+"</span><span class=LinkCard-meta><span style=display:inline-flex;align-items:center><svg class="+"'Zi Zi--InsertLink'"+" fill=currentColor viewBox="+"'0 0 24 24'"+" width=17 height=17><path d="+"'M6.77 17.23c-.905-.904-.94-2.333-.08-3.193l3.059-3.06-1.192-1.19-3.059 3.058c-1.489 1.489-1.427 3.954.138 5.519s4.03 1.627 5.519.138l3.059-3.059-1.192-1.192-3.059 3.06c-.86.86-2.289.824-3.193-.08zm3.016-8.673l1.192 1.192 3.059-3.06c.86-.86 2.289-.824 3.193.08.905.905.94 2.334.08 3.194l-3.059 3.06 1.192 1.19 3.059-3.058c1.489-1.489 1.427-3.954-.138-5.519s-4.03-1.627-5.519-.138L9.786 8.557zm-1.023 6.68c.33.33.863.343 1.177.029l5.34-5.34c.314-.314.3-.846-.03-1.176-.33-.33-.862-.344-1.176-.03l-5.34 5.34c-.314.314-.3.846.03 1.177z'"+" fill-rule=evenodd></path></svg></span>"+link+"</span></span><span class=LinkCard-imageCell><img class=LinkCard-image alt=图标 src=https://www.littleqiu.net/images/Avatar.png></span></span>";
|
||
}
|
||
}
|
||
}
|
||
</script>
|
||
<a href="https://www.littleqiu.net/ubuntu-to-go/" class="LinkCard">Ubuntu To Go | 制作属于你的随身 Ubuntu 系统盘</a>
|
||
|
||
## 准备
|
||
|
||
- 一个大于8GB的U盘或者移动硬盘
|
||
- [Vmware Workstation](https://www.vmware.com/products/workstation-pro/workstation-pro-evaluation.html)
|
||
- Ubuntu [安装盘](https://mirrors.163.com/ubuntu-releases)
|
||
- 一个可以联网的计算机
|
||
|
||
## 安装
|
||
|
||
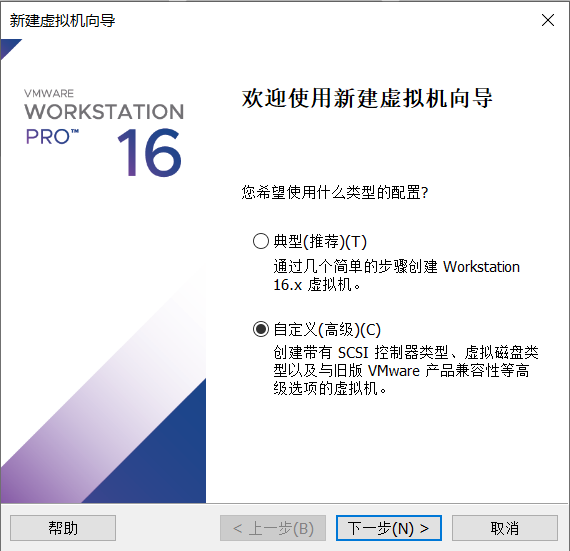
### 准备虚拟机
|
||
|
||
插入你的U盘
|
||
|
||
|
||
|
||
内存最好打一点,不然比较卡(
|
||
|
||
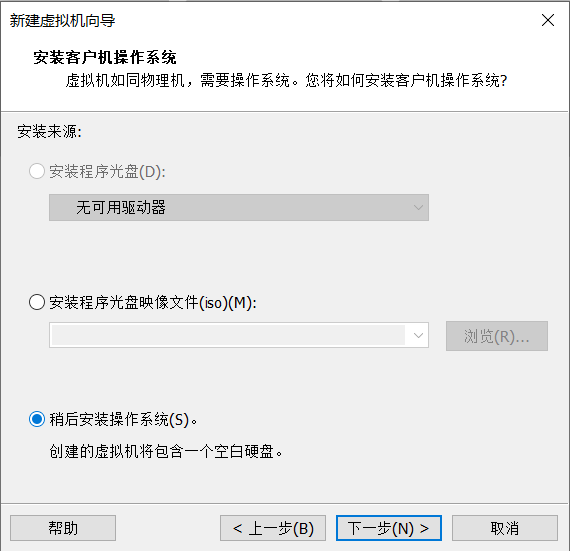
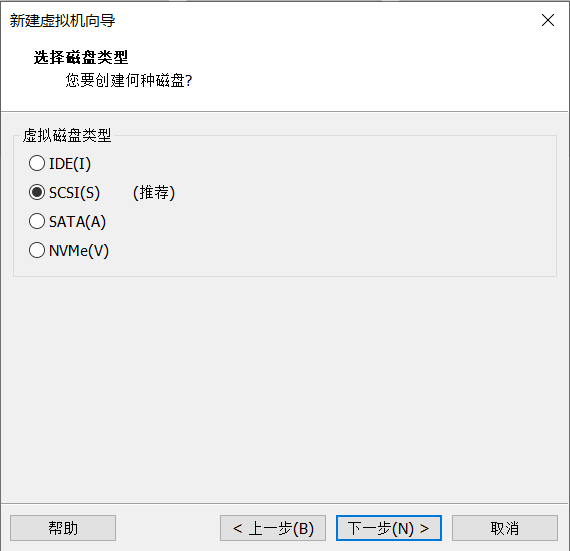
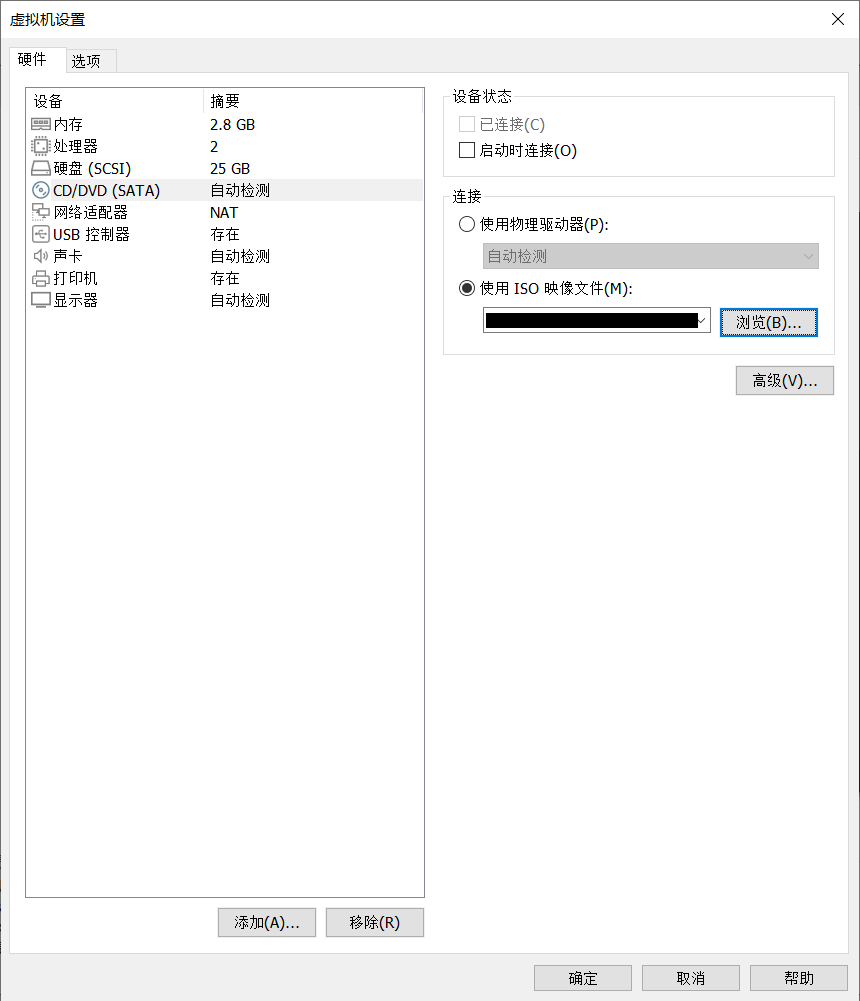
接下来的磁盘设置就比较重要了。这是决定你的系统安装位置的设置项。
|
||
|
||

|
||
|
||

|
||
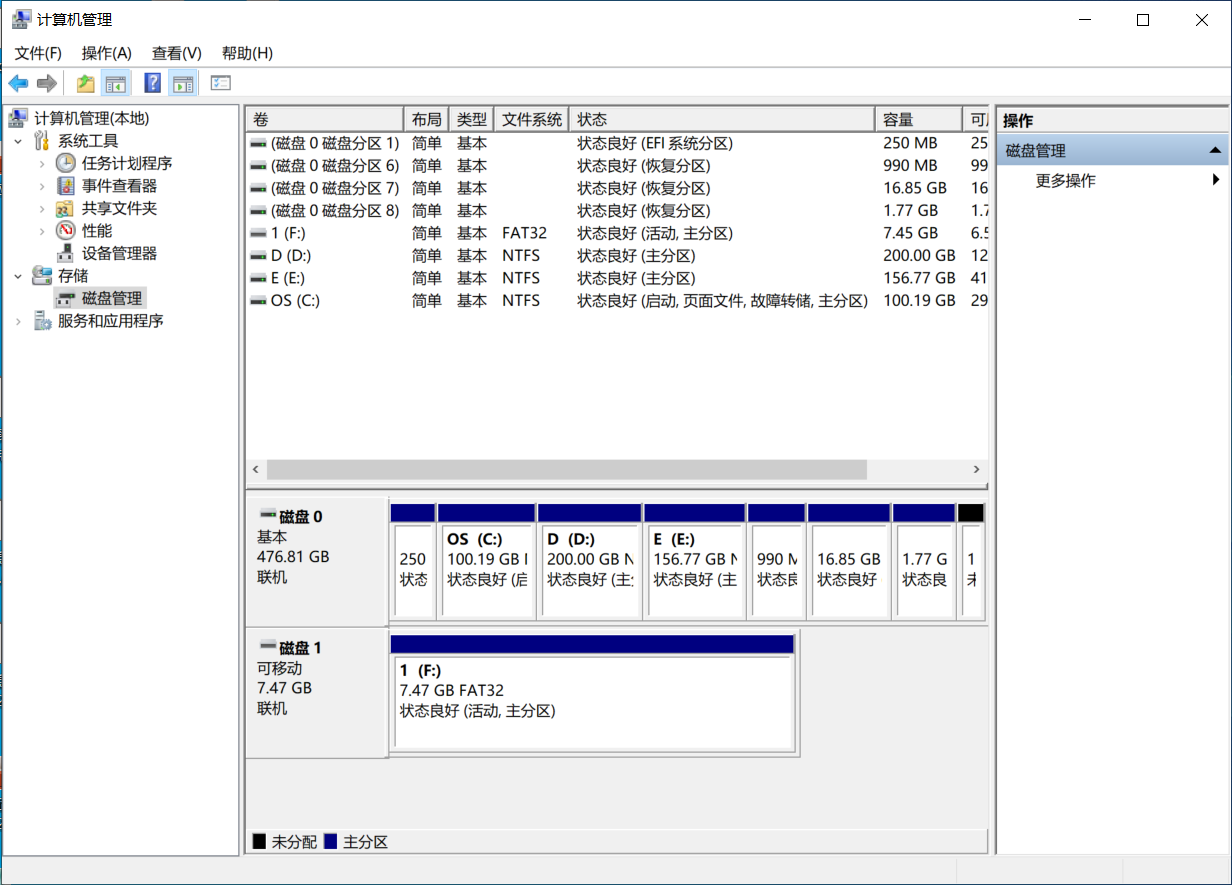
这个时候就要小心一点了,因为要设置安装的硬盘。你可以根据你的电脑有几个实体硬盘来判断。比如只有一个实体硬盘的你新插入的U盘应该是 PhysicalDrive 1,如果有两个则是 PhysicalDrive 2。如果你不确定的话可以右键此电脑,选择「管理」,点击「磁盘管理」,查看盘号。
|
||
|
||
如果 Vmware 没有识别到你的U盘,多半是因为你先打开的 Vmware 后插入的U盘,这个时候你需要关掉虚拟机重新打开。
|
||
|
||
|
||
### 安装 Ubuntu
|
||
|
||
|
||

|
||
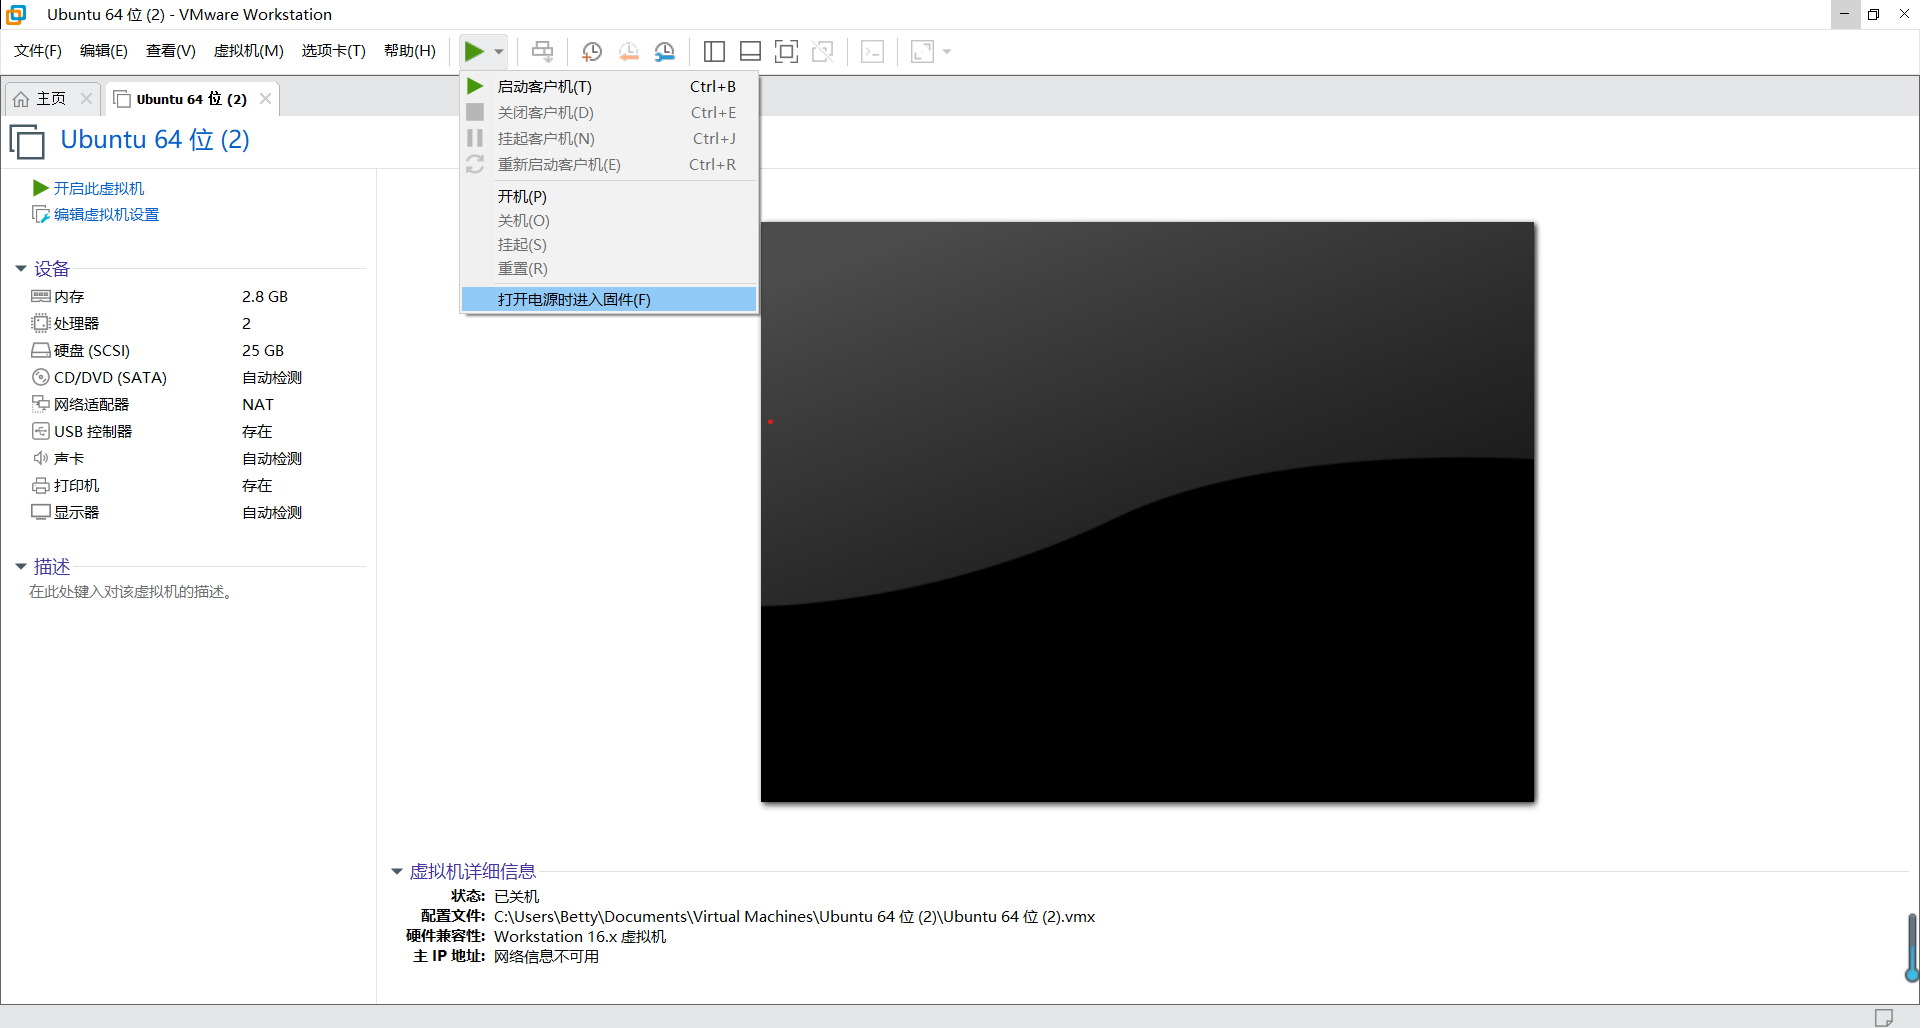
在安装界面选择「试用 Ubuntu」
|
||
|
||
|
||
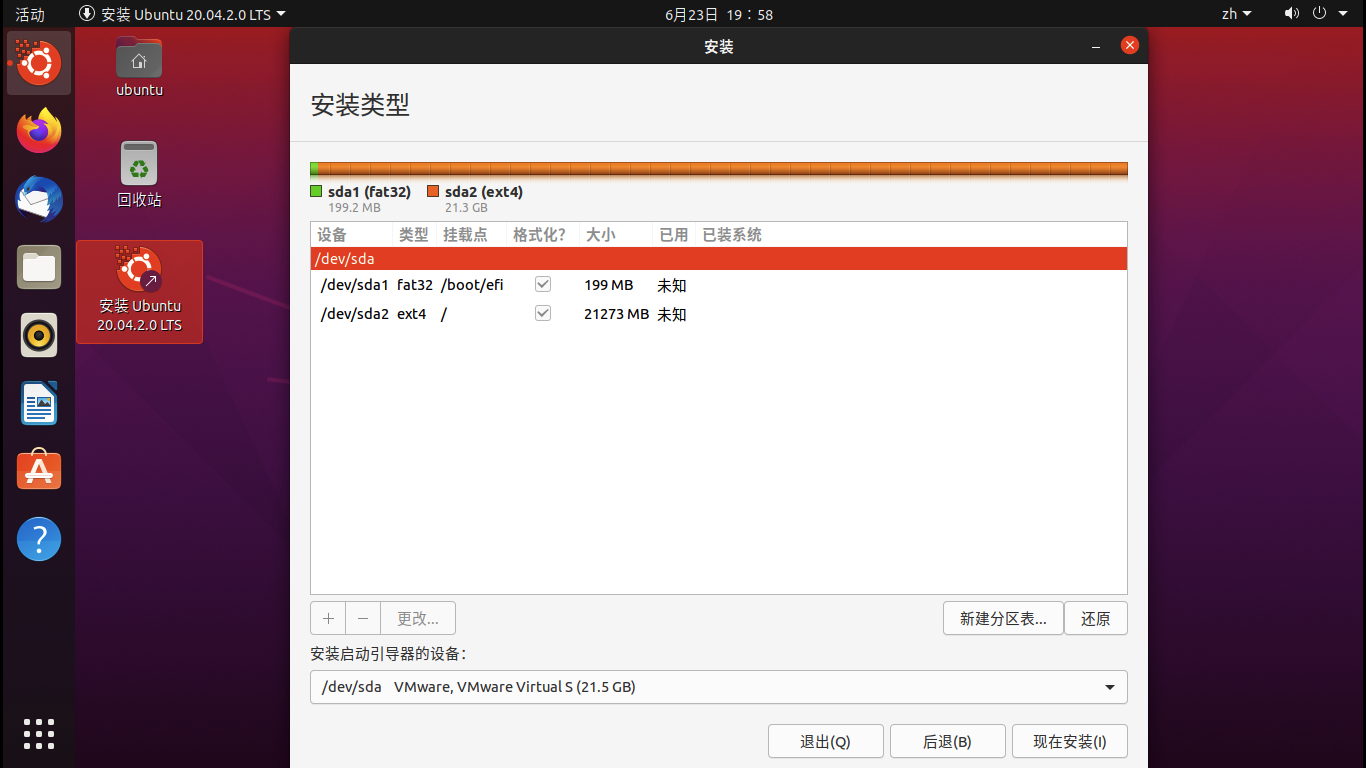
点击桌面的安装程序进行常规安装。在选择安装类型的时候要选「其他选项」。我们要对硬盘进行分区。
|
||
|
||
>一般来说全新的 U 盘都会有一个 FAT32/NTFS/exFAT 分区,把这个分区删掉。在磁盘前部建立一个大小为 200MB 的 FAT32 分区作为 EFI 分区,必须是主分区,挂载点为 /boot/efi。然后建立根分区(挂载点为 /),这个分区也必须是主分区。你可以按你的喜好来配置根分区,我的建议是分区大小不小于 10GB,分区格式为 EXT4。你也可以按照个人喜好给 /usr,/home,/var,/tmp 等目录单独划分分区。如果你的 U 盘容量比较大,可以在磁盘后部留下一点空闲的空间,安装完成后把这部分空间单独划分出一个 NTFS 分区来,你的 Ubuntu To Go 系统盘还能继续当 U 盘使。————摘自[《Ubuntu To Go | 制作属于你的随身 Ubuntu 系统盘 | DreamCity》](https://www.littleqiu.net/ubuntu-to-go/)
|
||
|
||
|
||
|
||
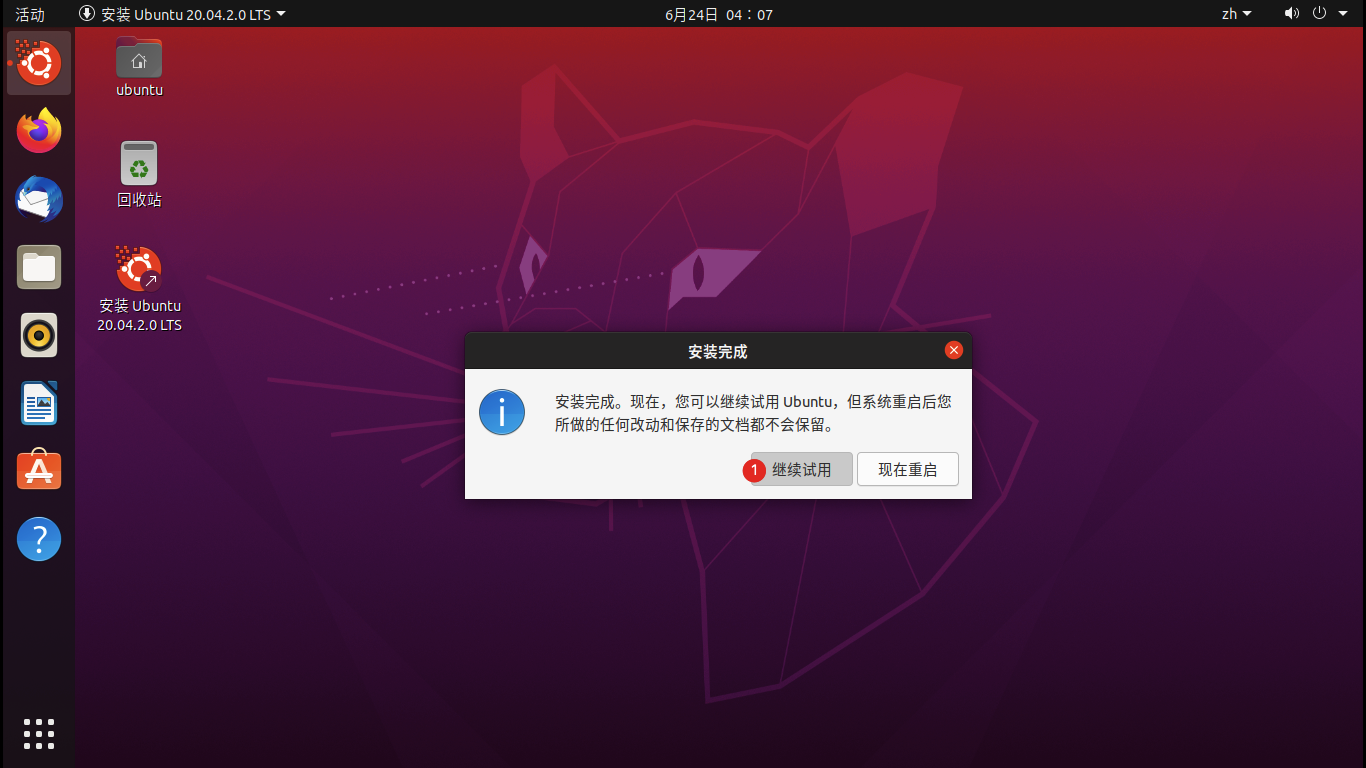
如果你确定你做好了分区,那么就点击「现在安装」进行下一步的配置。一般来说也是一路 Next 下去,设置一下个人信息就好了。如果确认设置无误,可以正式开始安装。因为 U 盘的读写性能比较低而且虚拟机有性能损耗,安装过程会比较长,不过一般都会在一个小时内结束。(所以建议拿读写速度快的硬盘安装)
|
||
|
||
|
||

|
||
|
||
|
||
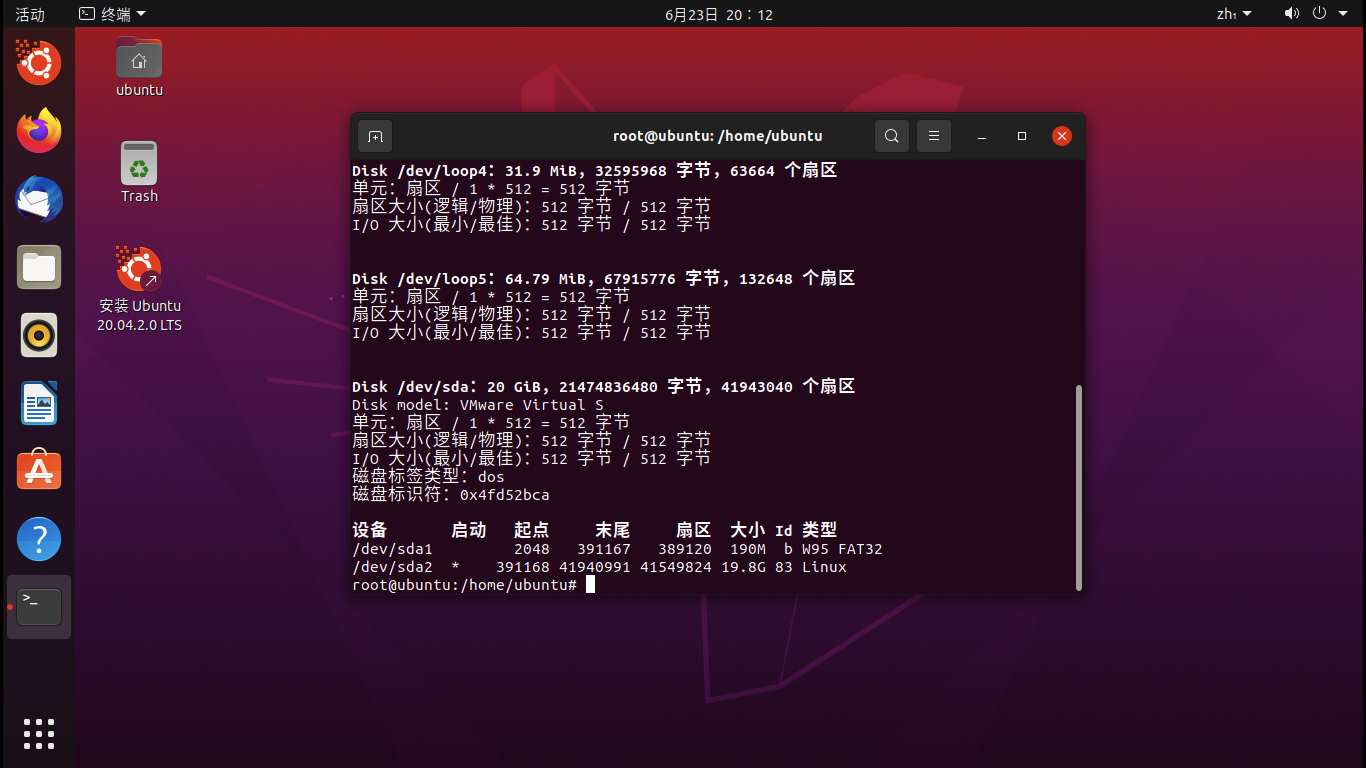
在 LiveCD 中,打开终端
|
||
|
||
``` bash 获取 root 权限
|
||
sudo -s
|
||
```
|
||
``` bash 查看分区
|
||
fdisk -l
|
||
```
|
||
|
||
``` bash 挂载分区
|
||
mount /dev/sda2 /mnt
|
||
mount /dev/sda1 /mnt/boot/efi
|
||
mount --options bind /dev /mnt/dev
|
||
mount --options bind /proc /mnt/proc
|
||
mount --options bind /sys /mnt/sys
|
||
mount --options bind /run /mnt/run
|
||
# 如果你有划分其他分区,最好也挂载它们。如下指令为挂载 /dev/sda3 为 /home。
|
||
# mount /dev/sda3 /mnt/home
|
||
```
|
||
{% raw %}<div class="notification is-danger">{% endraw %}
|
||
可能你和我的分区存在差异,只要将 sda1 或 sda2 更换成你现实的就好了。在挂载时要先挂载根分区再挂载 EFI 分区
|
||
{% raw %}</div>{% endraw %}
|
||
|
||
``` bash 进入 Chroot 环境
|
||
chroot /mnt
|
||
```
|
||
|
||
```
|
||
root@ubuntu:/# apt-get install grub-efi
|
||
|
||
正在读取软件包列表...
|
||
完成正在分析软件包的依赖关系树
|
||
正在读取状态信息... 完成
|
||
有一些软件包无法被安装。如果您用的是 unstable 发行版,这也许是因为系统无法达到您要求的状态造成的。该版本中可能会有一些您需要的软件包尚未被创建或是它们已被从新到(Incoming)目录移出。下列信息可能会对解决问题有所帮助:
|
||
下列软件包有未满足的依赖关系:
|
||
grub-efi :
|
||
依赖: grub-common (= 2.04-1ubuntu26.2) 但是 2.04-1ubuntu26.8 正要被安装
|
||
依赖: grub-efi-amd64 (= 2.04-1ubuntu26.2) 但是它将不会被安装
|
||
E: 无法修正错误,因为您要求某些软件包保持现状,就是它们破坏了软件包间的依赖关系。
|
||
``` |